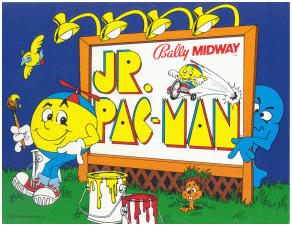
With how popular Pac-Man was when it first released in the early ‘80s, it’s no wonder the folks at Namco and Bally Midway wanted to cash in as hard as they could with the franchise. This meant that it would get several sequels, spinoffs, and other related titles, as long as demand persisted. However, by the time Super Pac-Man was released, consumers appeared to have too much “Pac-Man Fever,” as the game failed to receive as much love from the fandom. However that would not dissuade Bally Midway, who figured there was still plenty of cash to milk from the proverbial “Pac-Cow.” Like they did with Super Pac-Man, the company didn’t exactly receive Namco’s blessing with their next entry, Jr. Pac-Man.
Developed and released in 1983, Jr. Pac-Man was meant to be a more matured themed version of the popular pellet-eating maze crawling game in the form of different intermissions prizes. Moreover, the game employs much larger mazes than found in previous Pac-Games; These are so large in fact, that the screen has to scroll as you move to show the current portion. While this does allow for big levels, it does remove one advantage of the originals, where you could see everything all at once, and know if you have gathered all of the pellets to move on. In Jr. Pac-Man, you’ll have to be paying close attention, or retread ground, to ensure that you got everything. Otherwise, it’s still Pac-Man at its core.
In order to win, the player must eat every single pellet on the map, which allows them to progress to the next level. There are 7 different layouts in Jr. Pac-Man, and after completing the 7th, they will loop back to the 4th and continue in this manner until reaching the kill screen. The stages here are named after the bonus items that appear in each one which, in ascending order, would be a bicycle, a kite, a drum, a balloon, a cat, and a glass of beer.
Since the controls and goals are pretty straightforward, we’re going to dedicate this article to briefly talk about the seven different map layouts and give a few tips on how to tackle each one of them.
Stage 1: Bike Maze
A simple layout consisting of 548 regular pellets and 6 power pellets. This is the closest you’ll get to regular Pac-Man as, despite its much larger size, the layout is quite similar to the stages in the previous games.
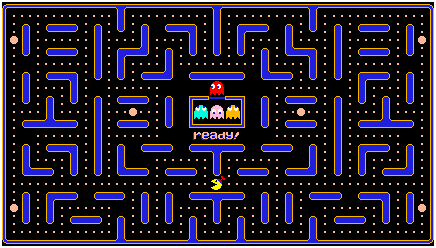
The ghosts here move quite slow and there’s plenty of options when it comes to navigating and staying safe. As long as you stay calm and plan out your power pellet usage, you should be fine. There are no major hazards in this stage, which makes it a great introduction to the game.
Stage 2: Kite Maze
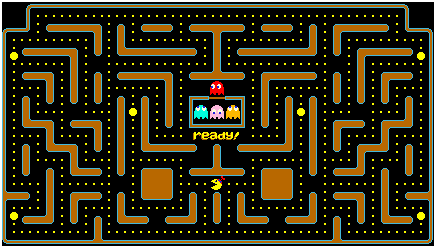
The second stage is a bit larger, containing 560 pellets and 6 power pellets. This one features a more dangerous layout than the previous as it has long pathways that could be ideal grounds for ghost ambushes. However, there’s still lots of breathing room here since you can use the square “pathway” around the inner edge of the stage to put some distance between the ghosts and yourself, and then branch out to the sides to clear the pellets. Also, feel free to use the stair-shaped pathways to further slow down pursuing ghosts.
Stage 3: Drum Maze
This is one of the smallest stages in the game, with 526 pellets and 6 power pellets. However, while its layout is pretty simple, it has one notable hazard, the circular sections.
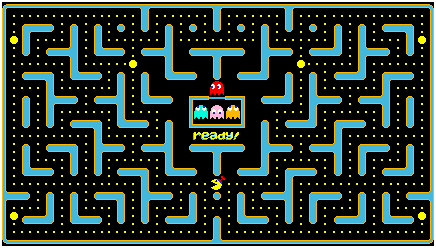
The small circles dotted across the stage, which have pellets around them, can be quite dangerous, especially when it comes to avoiding ghosts. When an enemy walks around these sections, it’s exceedingly difficult to tell if they’re going to change directions or keep moving towards you. In this sense, it’s best to just avoid the circles if there are ghosts nearby. Also, keep in mind that the ghosts are starting to speed up at this point, so try to give them a wide berth.
Stage 4: Balloon Maze
Along with stage 3, this is another one of the smaller stages, featuring the same 526 pellets and 6 power pellets.
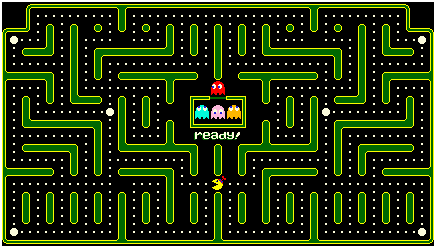
This maze is where you’ll need to start planning your movements in advance as it not only has plenty of circular sections, but it also has a series of isles strewn throughout the bottom half of the stage. These isles can make it both easy to flee pursuing ghosts if you have them under control, or tougher than usual as you can easily get ambushed if you don’t keep the ghosts following directly behind you.
The idea to clear this maze is to focus on the top half, putting some distance between the ghosts and yourself, and then traveling to the bottom. Try to clear as many pellets from the bottom as you can, and then head back to the corner to grab a power pellet to help you clear the remaining dots.
Stage 5: Train Maze
This one is a tad larger than the previous two, with 528 pellets and 6 power pellets.
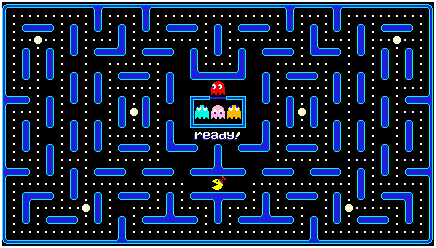
The layout is pretty straightforward, featuring lots of isles on the side, but no circular sections. There’s really no surefire way to beat this one, other than the usual. Try to keep the ghosts chasing behind you at all times and you should be fine. However, keep in mind that power pellets start becoming less effective at this point so don’t try to rely as much on them.
Stage 6: Cat Maze
The smallest stage in the game, with 512 pellets and only 4 power pellets.
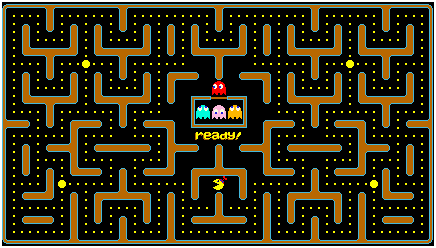
This maze is exceedingly tricky as it’s riddled with “Y” sections that require lots of commitment to navigate. A wrong move in this stage means that you can get boxed inside one of these sections, losing a life in the process. And since you have fewer power pellets here, it’s hard to rely on anything but your skills to beat this one.
A good tip for dealing with this one is by eating the bonus items as soon as it appears to prevent it from growing and slowing you down more when you actually eat it.
Stage 7: Beer Maze
It seems the devs definitely left the toughest challenge for last as stage 7 definitely isn’t playing around. It features 540 pellets and 4 power pellets. However, while the inner areas of the level are difficult enough, with circular sections and isles, the outer regions are borderline-suicide since they consist exclusively of boxed-off sections that spell certain death if you enter one of them without a proper exit strategy. The best way to clear these outer sections is by properly using your power pellets. You get 4 of these that, if used correctly, can get you through all six boxed sections safely. The rest, however, is in your hands.
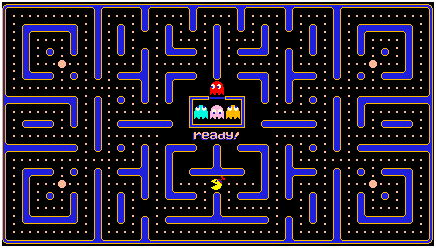
If you’ve gotten this far, you shouldn’t have much problems clearing regular isles and circular sections, so do the same you’ve been doing up to this point and you’ll be fine.
Once you clear stage 7, the game will loop back to stage 4, and the cycle will continue until the kill screen. However, after stage 7, the bonus item will always be the glass of beer, which grants 5,000 points when eaten. Moreover, there will come a time when the ghosts won’t become vulnerable after eating a power pellet, and will instead run in the opposite direction until the effects wear off.
Good luck!
Thanks for reading! Here at PrimeTime Amusements, we like to keep ahead of the curve in arcade game rental and sales and pride ourselves in providing the best service in the country. If you’re looking for a game in particular, or have a few questions about the industry, feel free to give us a call at 1.800.550.0090 or to swing by at 5300 Powerline Rd. Suite 210, Ft. Lauderdale, Florida, 33309.

